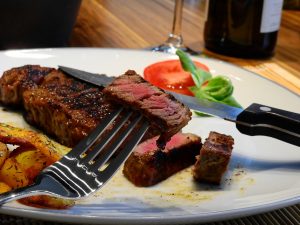
 With our new harvest of beef packed into the freezers, I want to address a common question we get…Is there a special way to cook grass-fed/finished beef?
Yes, there is!
I’m going to share with you what I do to get a perfect piece of beef every time. These tips are good for whole meat, like steaks or roasts, not so much ground beef, but I will go over cooking ground beef, too.
But before you pull out the pan or fire up the grill, you need to know how grass-fed/finished beef is different from grain-fed.
What’s the Difference?
When it comes to cooking beef, grass-fed/finished beef is leaner overall. There is marbling throughout our steaks, but it’s different from grain-fed/finished beef. Grass-fed/finished beef has thinner marbling streaks throughout the meat compared to grained beef’s hunks of fat.
That means when you cook a steak, there is a fine line between rendering out too much fat and just enough to maintain tenderness.
Since there is less, albeit better quality, fat in grass-fed/finished beef you have less wiggle room between perfect and overcooking.
It may take some practice, but these tips will have you serving up steak dinners with confidence in no time!
Proper Defrost and Pre-Rest
Make sure you don’t start with a half-frozen piece of meat. Take the meat out the day before and place it in the fridge on a rimmed cookie sheet or pan. I love our toaster oven sized cookie sheets for this.
A pack of steaks or ground beef will be fine overnight, a roast may need an extra day, in the fridge.
If you forget to take it out of the freezer, you can put it on a cookie sheet set on top of a stove top grate or bowl (you want air circulation under) and flip it over every hour or so until defrosted.
Take the meat out of the fridge a minimum of 15 minutes before cooking it. This is the pre-rest that helps get it closer to room temp. The larger the piece of meat, the longer you want it out. A 5 lbs roast should be out for 30-45 minutes.
No, you will not get food poisoning from leaving the meat out of the fridge for this long.
Proper Cooking Temperature/Technique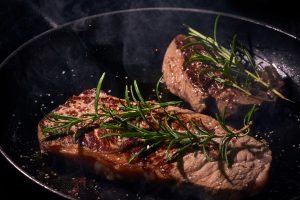
If you buy and use a cast-iron skillet for nothing else, use it for meat. It makes cooking easier and it really does give it a better flavor.
What I’ve found is most people cook with either too low or too high of a heat. With steak, you want to start high and go down to medium about halfway through.
For the crisp sear, use butter. Lots of butter.
I use the 1-minute flip technique for our steaks. Cast-iron pan on high heat, add 2 Tablespoons of butter after 30 seconds, wait until it’s browning and bubbly, add your meat.
Either set a timer or watch the stove clock and with tongs, flip the meat away from you every minute. After 4 minutes, turn down the heat just a tad to medium and continue cooking until you get to your preferred doneness.
And never, ever, never smash the meat with a spatula or poke and flip with a fork or knife. You lose all of the juiciness that way.
Internal Temperature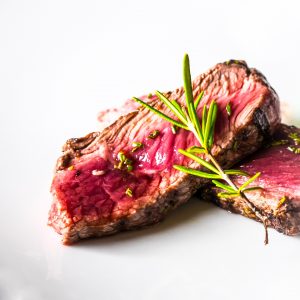
The best way to know if it’s done to your liking is by using a meat thermometer. Using a thermometer along with the touch test will help you not poke the meat too many times.
But aren’t meat thermometers expensive? Yes and no. If you spend $50 on a thermometer and cook meat once a week, you spend 90 cents a meal to make sure it’s not overcooked. Cook meat twice a week? You’re down to 45 cents a meal.
It’s worth the investment to not ruin quality meat. We use this one and this one as well.
We recommend our steaks at medium-rare, maybe even just barely medium. There will be some pink in the middle. We do not recommend cooking our steaks well done. If you like well-done beef, our cuts may not be for you. The ground beef is fine well-done.
Rare 120-130F
Medium-Rare 130-35F
Medium 135-145F
Medium-rare?! What about the blooooooood!
That “blood” in your steak isn’t blood. It’s the protein myoglobin which helps muscle tissue store oxygen. Iron in the myoglobin turns red when it binds with oxygen, giving raw meat its red color. If you’ve ever bitten the inside of your cheek or lip, you know what blood tastes like. I doubt anyone would eat red meat if it tasted like blood.
Rest Time
You’ve been waiting all day for this steak dinner. You pull it out of the pan at a perfect 135F and you’re ready to dig in!
Don’t do it! It needs to rest.
I used to think this was optional, but if you want the most from your beef, just wait 10-15 minutes.
The rest time allows the meat to finish cooking and helps to retain the moisture. If you cut it right out of the pan the juices will literally run out resulting in dry meat. Moisture = Tenderness
I use the rest time to saute veggies, usually onions and mushrooms, in the same pan so they are cooked and covered in all that buttery beefy fatty goodness. Spinach, kale, and squash are also good.
Ground Beef
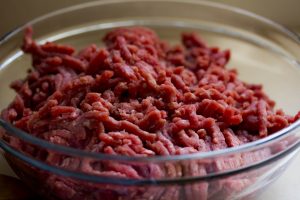 Cooking ground beef is different from whole cuts like steaks or roasts. Because it’s ground and has more surface area, i.e more places for possible contamination, it needs to be cooked to 160F.
When you are browning meat for tacos or spaghetti, cooking until you see no pink bits is usually the standard of doneness. Cooking meatloaf, meatballs, or burgers, you want to check the temp and make sure it’s up to 160F.
It doesn’t need the pre-rest, but I usually stick a butter knife through the middle to make sure it is fully defrosted. And it doesn’t need the post-cooking rest time either.
So now you know how to prep, cook, and rest grass-fed/finished beef for the perfect dinner your family will love!
Ready to order beef? Click here!
Wow. Thank you Serena. I honestly had NO idea there was any differences in cooking grass-fed/finished meat. Much appreciated!
Good info here. When cooked like this nothing beats grass fed, grass finished beef! Thank you for the link to the DOT. I just ordered one! 🙂