Stuart Farm

  • Our Story
  • Shop
    • Our Store
    • Where to Buy
  • Come Enjoy a Farm Stay!
  • Our Classes
  • Fertrell Products
  • Contact Us
  • Blog Posts
    • Our Animals
    • Mother Nature
    • Our Garden
    • Recipes
    • Farm Life
    • Projects
  • Consultation Services
  • 0 items

Get Ready for Fall–Bacon Wrapped Butternut Squash

Posted on September 20, 2019 Written by Serena Leave a Comment

No matter where I’ve lived, Fall was always my favorite season. Maybe it’s because most places had stifling hot summers and the cooler weather (75 is cold, right?) was a welcome break.

But more than likely it’s because I LOVE comfort food!

Now that I am in Missouri, not only do I get beautiful fall foliage, I have a Fall and Winter that beg for hearty rich comfort foods. And this recipe is the perfect welcome to Fall!

A couple of tips/options for this.

  • You can cut the squash in chunks and wrap smaller slices of bacon around it for appetizers.
  • I used the whole slice of bacon, but cutting it lengthwise for thinner strips would have been better bacon to squash ratio.
  • Soak toothpicks in water and use to secure the bacon; especially if you use chunks.
  • If you have extra unwrapped squash and room on your pan, just add it on.  The bacon grease will add yummy bacon flavor to it.

Bacon-Wrapped Butternut Squash

1 medium butternut squash, peeled, seeded, cut into chunks 1″x1″ or slices 1/4″ thick.

1 pack Stuart Farm bacon

Equipment:

rimmed baking sheet, silicone baking mat (or foil), knife, peeler, cutting board, toothpicks.

Sliced squash: cut each slice of bacon lengthwise to make thinner, wrap around and down a slice of squash, secure with a soaked toothpick if desired.  Arrange on a rimmed baking sheet with a slipmat or foil.
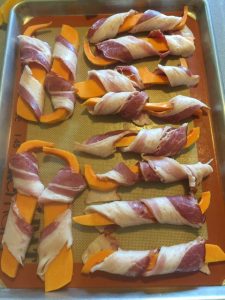
Toothpicks would have kept it wrapped tighter.

Chunked squash: cut each slice of bacon into pieces long enough to wrap around each chunk with some overlap, and secure with a soaked toothpick.  Arrange seam side down on a rimmed baking sheet with a slipmat or foil.

Bake @ 425F for 30 minutes or until squash is tender.

Removes from baking sheet and plate on a bed of greens, garlicky pasta, or mac and cheese. Enjoy!
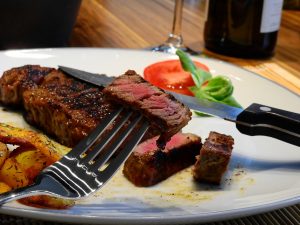
Filed Under: Farm Life, Recipes Tagged With: recipes

4 Tips for Cooking Grass Fed Beef

Posted on July 26, 2019 Written by Serena 2 Comments

With our new harvest of beef packed into the freezers, I want to address a common question we get…Is there a special way to cook grass-fed/finished beef?
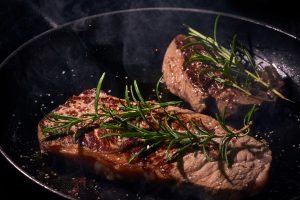
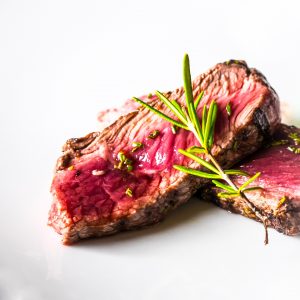
Yes, there is!

I’m going to share with you what I do to get a perfect piece of beef every time. These tips are good for whole meat, like steaks or roasts, not so much ground beef, but I will go over cooking ground beef, too.

But before you pull out the pan or fire up the grill, you need to know how grass-fed/finished beef is different from grain-fed.

What’s the Difference?

When it comes to cooking beef, grass-fed/finished beef is leaner overall.  There is marbling throughout our steaks, but it’s different from grain-fed/finished beef.  Grass-fed/finished beef has thinner marbling streaks throughout the meat compared to grained beef’s hunks of fat.

That means when you cook a steak, there is a fine line between rendering out too much fat and just enough to maintain tenderness.

Since there is less, albeit better quality, fat in grass-fed/finished beef you have less wiggle room between perfect and overcooking.

It may take some practice, but these tips will have you serving up steak dinners with confidence in no time!

Proper Defrost and Pre-Rest

Make sure you don’t start with a half-frozen piece of meat.  Take the meat out the day before and place it in the fridge on a rimmed cookie sheet or pan.  I love our toaster oven sized cookie sheets for this.

A pack of steaks or ground beef will be fine overnight, a roast may need an extra day, in the fridge.

If you forget to take it out of the freezer, you can put it on a cookie sheet set on top of a stove top grate or bowl (you want air circulation under) and flip it over every hour or so until defrosted.

Take the meat out of the fridge a minimum of 15 minutes before cooking it.  This is the pre-rest that helps get it closer to room temp. The larger the piece of meat, the longer you want it out.  A 5 lbs roast should be out for 30-45 minutes.

No, you will not get food poisoning from leaving the meat out of the fridge for this long.

Proper Cooking Temperature/Technique

If you buy and use a cast-iron skillet for nothing else, use it for meat. It makes cooking easier and it really does give it a better flavor.

What I’ve found is most people cook with either too low or too high of a heat.  With steak, you want to start high and go down to medium about halfway through.

For the crisp sear, use butter. Lots of butter.

I use the 1-minute flip technique for our steaks.  Cast-iron pan on high heat, add 2 Tablespoons of butter after 30 seconds, wait until it’s browning and bubbly, add your meat.

Either set a timer or watch the stove clock and with tongs, flip the meat away from you every minute.  After 4 minutes, turn down the heat just a tad to medium and continue cooking until you get to your preferred doneness.

And never, ever, never smash the meat with a spatula or poke and flip with a fork or knife.  You lose all of the juiciness that way.

Internal Temperature

The best way to know if it’s done to your liking is by using a meat thermometer.  Using a thermometer along with the touch test will help you not poke the meat too many times.

But aren’t meat thermometers expensive? Yes and no.  If you spend $50 on a thermometer and cook meat once a week, you spend 90 cents a meal to make sure it’s not overcooked.  Cook meat twice a week? You’re down to 45 cents a meal.

It’s worth the investment to not ruin quality meat. We use this one and this one as well.

We recommend our steaks at medium-rare, maybe even just barely medium. There will be some pink in the middle. We do not recommend cooking our steaks well done. If you like well-done beef, our cuts may not be for you.  The ground beef is fine well-done.

Rare 120-130F

Medium-Rare 130-35F

Medium 135-145F

Medium-rare?! What about the blooooooood!

That “blood” in your steak isn’t blood. It’s the protein myoglobin which helps muscle tissue store oxygen. Iron in the myoglobin turns red when it binds with oxygen, giving raw meat its red color. If you’ve ever bitten the inside of your cheek or lip, you know what blood tastes like. I doubt anyone would eat red meat if it tasted like blood.

Rest Time

You’ve been waiting all day for this steak dinner. You pull it out of the pan at a perfect 135F and you’re ready to dig in!

Don’t do it!  It needs to rest.

I used to think this was optional, but if you want the most from your beef, just wait 10-15 minutes.

The rest time allows the meat to finish cooking and helps to retain the moisture. If you cut it right out of the pan the juices will literally run out resulting in dry meat. Moisture = Tenderness

I use the rest time to saute veggies, usually onions and mushrooms, in the same pan so they are cooked and covered in all that buttery beefy fatty goodness. Spinach, kale, and squash are also good.

Ground Beef

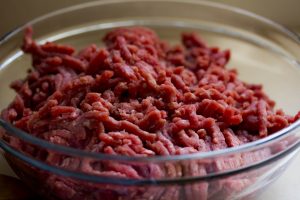
Cooking ground beef is different from whole cuts like steaks or roasts.  Because it’s ground and has more surface area, i.e more places for possible contamination, it needs to be cooked to 160F.
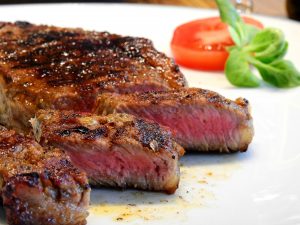
When you are browning meat for tacos or spaghetti, cooking until you see no pink bits is usually the standard of doneness. Cooking meatloaf, meatballs, or burgers, you want to check the temp and make sure it’s up to 160F.

It doesn’t need the pre-rest, but I usually stick a butter knife through the middle to make sure it is fully defrosted. And it doesn’t need the post-cooking rest time either.

So now you know how to prep, cook, and rest grass-fed/finished beef for the perfect dinner your family will love!

Ready to order beef? Click here!

Have more questions? Want to share how the tips worked for you? Leave a comment.

Filed Under: Recipes Tagged With: Beef recipes

Older Beef = the BEST Beef (Seriously!)

Posted on July 19, 2019 Written by Serena 14 Comments

You’ve been lied to. Tricked! Fooled! Bamboozled!
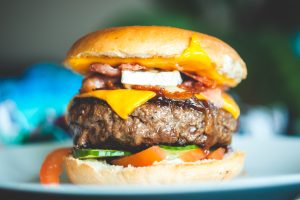
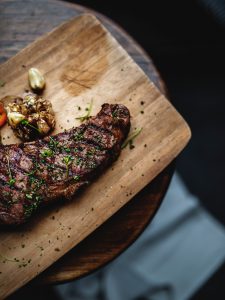
Ok, maybe just really misled. But no more!

We’ve been told by so many people, and a lot of advertisers, what makes good beef, that the old wisdom of raising cattle has been forgotten. And now, shunned.

Misconception #1

Younger beef is tender because it hasn’t had time to “toughen up”.

NOT TRUE!

Beef is tender for two reasons: the amount of marbling within the muscle and how much that muscle was used.

When beef is grain-fed, the age doesn’t matter because the grain adds the extra fat creating marbling.

When beef is completely grass-fed and grass-finished, it takes longer to create that marbling, but it does happen.

Some cuts will always be more tender than others. After all, some muscles get more of a workout than others. Filets are hardly worked and rump roasts help the animal move around–a lot of work. So of course one will be more tender than the other.

Just because one cuts is “tougher” doesn’t mean it isn’t good, you just have to know how to prepare it. I’ve been thin-slicing roasts and marinading them overnight for amazing tacos and stir-fry.

Misconception #2

Old cows are only good for ground beef. 

So, so, so UNTRUE!

I know this one first hand. Remember Queen, the cow we lost this past winter? We had her butchered on-farm and she produced the best beef we’ve ever eaten.

Every steak was almost too tender. The ground beef was so flavorful I hated adding seasoning.

Then I found this video that compares a young steer (28 months which is older than the usual 18 month-old steers found in the store) with older cows (8 and 15 years old) Spoiler alert: The oldest cow was the best! Click here to watch the video.

So why do sooooo many people think this? I think it’s just lost knowledge.

I hear so many of our older customers say our meat tastes like what they grew eating.  The flavor, the texture, the color–it’s old school.  That’s because our beef is raised like it used to be–on grass, always outside, room to roam, and butchered older.

Add to that a huge marketing campaign to convince everyone that younger beef is better, and it’s no wonder small farmers are convinced it’s not worth the gas to the butcher to process an old cow.

Misconception #3

Older beef has a strong flavor.

Yes! It’s called BEEF FLAVOR!!!!!

The older the beef gets, the more flavor it develops. Do you squish grapes, put it in a glass, and call it wine? No!

Beef develops, creates, becomes flavor.

So many of us have forgotten what REAL beef tastes like. You don’t have to dress it up and slather it in sauce–the flavor does the work. The only thing I put on our steaks or burgers is salt. If it’s quality beef, that’s all you need.

It’s not just age that affects flavor. The breed, feed, and time of year butchered have an effect as well.

Every breed has different growth rates and flavor profiles. When someone is new to grass-fed/finished beef, I tell them to shop around and find a breed they like.

You are what you eat, goes for cattle as well. Even in the same county, pastures are different, so the beef will taste different.

With grass-fed/finished beef, time of year the beef is butchered not only affects the flavor but the marbling. Two months after the spring grass flush is prime time for butchering.  They’ve put on lots of good fat marbling from the lush grass.  Two months into winter hay feeding, they may start to lose some of that marbling and flavor.

So what does all of this mean for you as a consumer?

Don’t believe the hype. Young “tender” beef (15-18 mths old) fattened and/or finished on grain was a marketing campaign to get cattle to the butcher quicker, not to get you quality beef.

Talk to your farmer about what breeds they raise, age of butcher, time of year they’re butchered, and what they eat.

Also, make sure to ask how they are finished and supplemented; 30+ days grain finish (even organic grain) negates the benefits of grass-fed beef. Grass-fed/finished beef contains up to five times as much omega-3, about twice as much Conjugated linoleic acid (CLA), and much less monounsaturated fat than grain-fed beef. Who wants to lose that!?

New to grass-fed/finished beef and have questions? Ask away in the comments!

Filed Under: Farm Life, Recipes Tagged With: Beef recipes

Introducing Trudy’s Piglets!

Posted on June 25, 2019 Written by Serena 5 Comments

Every farrowing is different. Every sow works through it in her own way. That’s part of why I love to be there when it happens.
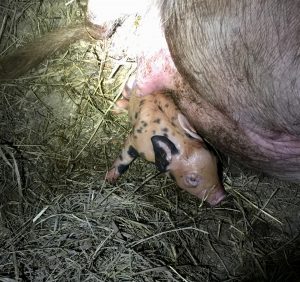
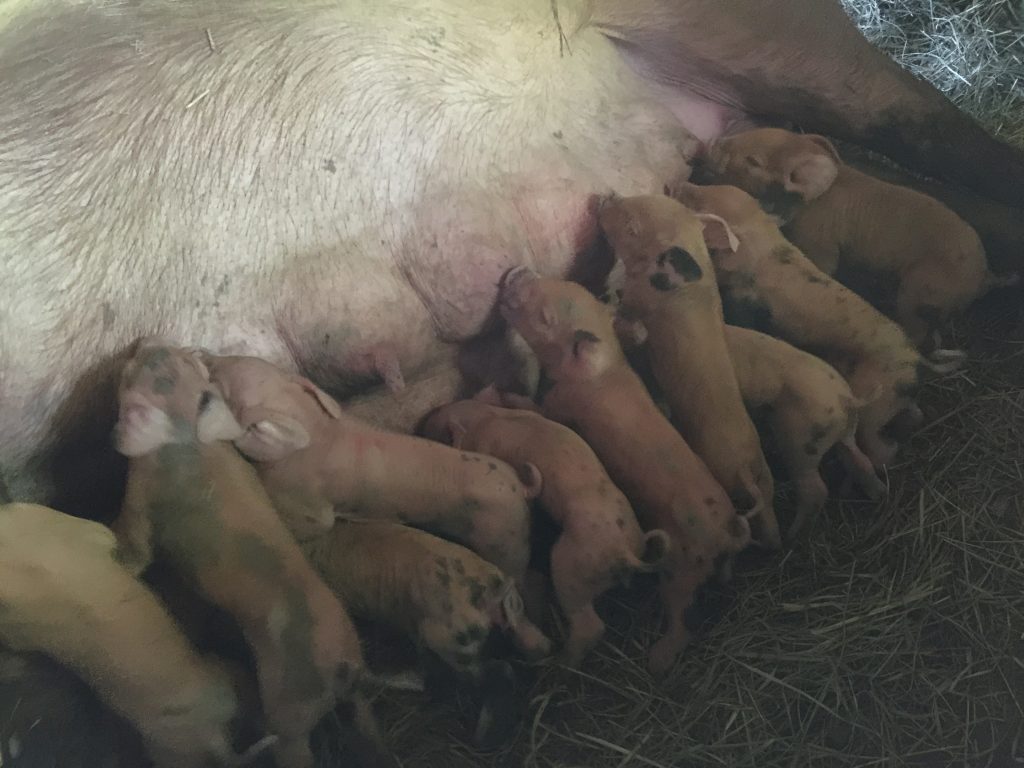
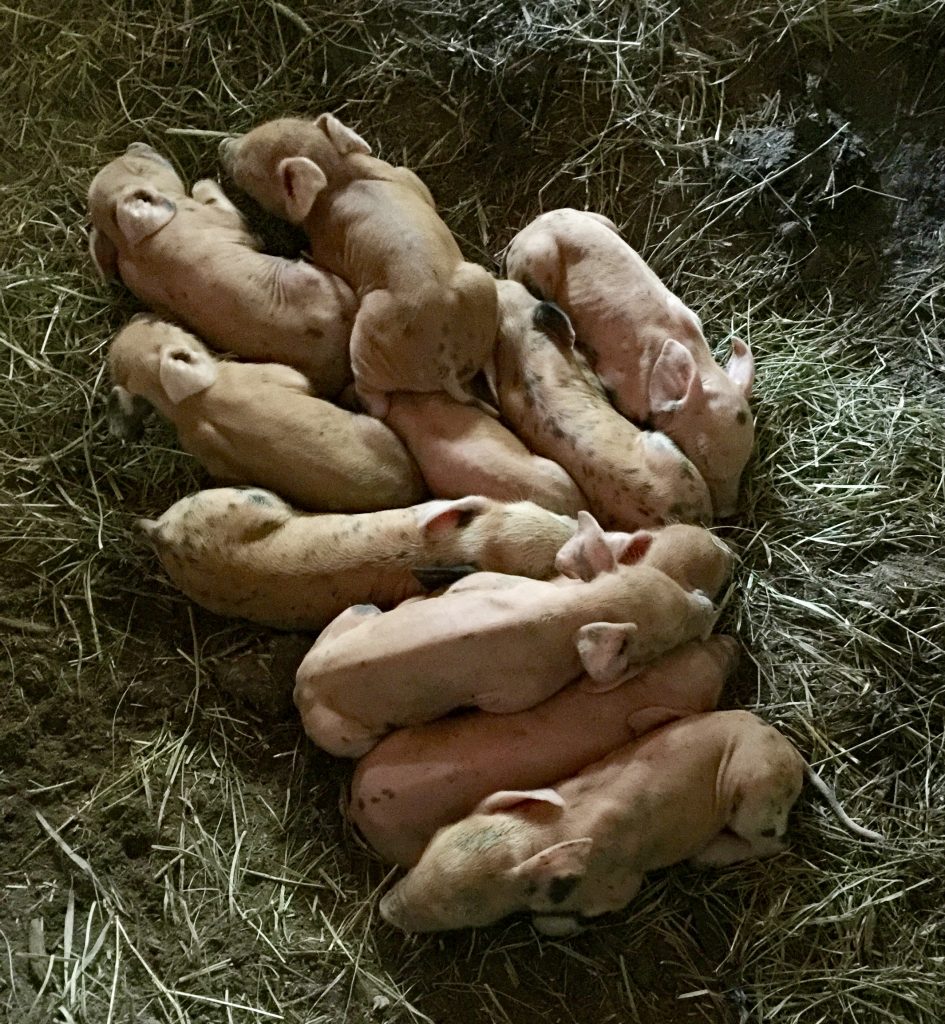
Yesterday afternoon, Trudy was on her side, up and down, and really uncomfortable, so I put a bale of hay into her stall. She immediately got up and started adding it to her nest and then peed. Both good signs!

Contrary to popular belief, pigs are quite clean and do not use their living space as a bathroom. So when she chose to use a corner as a toilet, I knew for sure, she was ready.

I checked on her once after chores and decided to come back later. When I returned at about 8:45pm, there was one piglet roaming around nowhere near Trudy. UGH!

The first piglet not nursing is an issue for two reasons. 1–nursing helps release oxytocin that helps with contractions. Better contractions mean easier birthing. 2–not nursing means no food, and no food means no warmth.

With her first litter, I was right there with no problem, but it was on pasture. Now, in a confined space, I was worried about how she would react to me jumping in.  And with the sides of the stalls chest high, mud to my ankles in front of the door, and a low ceiling, I had no good escape route if things went bad. Even if I did get in the pen to help, I’d have to walk in front of the bone-crushing jaws of a momma sow in labor to get to the piglet. Not happening. So I waited nervously.

When Trudy started to roll, I knew it could be a long and devastating night. She was trying to push a piglet out with her body. Up and down, rolling this way, rolling that way. With every movement, I cringed hoping she would avoid the piglet.  I coached her with a soft voice, “you can do it, Trudy, just relax and let it come.”  And it did–a huge piglet.

After the second piglet, she moved once more and put her belly facing the stall divider. PERFECT!  I could get into the next stall and help from there.

After I clamored along the edge of the barn, only stepping into the mud with my holey boot once, I was in the next stall and could reach the piglets and her belly.  I got each piglet on a teat and started rubbing the others. Soon number 3 came. 

I don’t know why she moved in that position by the divider, but it worked well. If she wanted to, she could take out the divider without much effort. I think she felt my safety concerns but wanted my help. It also kept the piglets close to her acting as a side of the nest.  And probably most useful, she pushed on it with her feet as she was delivering and having contractions.  I should have worn earplugs. The sound of a 400 lb sow in labor stomping against tin is deafening.

She was doing great! Some came almost right after the other. Some had a bit of a lag. Right as I was thinking, “I’m so lucky to have not witnessed a stillborn or mummy piglet”, she birthed a stillborn.

Of course, in my mind, I could save it. I pulled it over to my side, ripped off the sac and started compressions as I tried to clear the mouth with my finger. No luck. The legs were a bit bony and longer than they should be.  Maybe it died before filling out? Maybe it was a disorder? I don’t know.

Then she passed something strange; what looked like an empty sac. I pulled it over to my side and could see the outline of a small skull and partial spine.  When a piglet dies in utero, the mother’s system will begin to absorb it. I think that’s what it was.

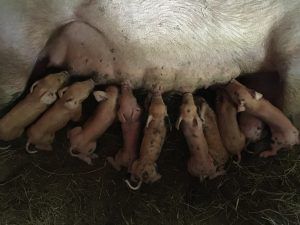
All in all, 11 healthy piglets, about half boys, and half girls were born in 3.5hours.  I stayed to make sure she passed all of the afterbirths–there are 2–and then watched everyone for a while to make sure each had a turn on the teat.

It’s a hard few first days for piglets. Being stepped or laid down on are the biggest issues. Since they can’t regulate their body temp well for the first few days, staying close to Trudy, and littermates in plenty of bedding helps maintain their heat. We breed our pigs for hardiness, so we don’t use heat lamps.

I left with high hopes of seeing all 11 this morning, and I did!  In the next week, we’ll be offering farm tours with some piggie playtime.  Until then, they’re all mine!!!!! 

Filed Under: Farm Life, Pigs Tagged With: pigs

  • « Previous Page
  • 1
  • …
  • 4
  • 5
  • 6
  • 7
  • 8
  • …
  • 19
  • Next Page »

Welcome to Stuart Farm!

We’re Serena and Fred Stuart. While raising healthy and happy animals is our #1 goal, we’re also here to serve you! If you’re looking for help in navigating healthy eating and living, you are in the right place! We’re here to answer your questions and help you feed your family meat and eggs you can feel good about. We share farm stories that gives you a peek into our life, recipes to try, health tips, and more. We hope you enjoy coming along on our farm adventures.

Connect with us

  • View StuartFarmLLC’s profile on Facebook
  • View stuart_farm’s profile on Instagram

Contact Us

573-764-2324 please leave a message .
Farm hours are by appointment only.

Tags

Beef recipes broth chickens delivery Devons Dorkings Eggs Farm Life Freedom Rangers garden lard pigs Pyrs raw diet recipes recipes sweets Silver Fox Rabbits Sugaring

Categories

  • Blog Posts (73)
    • Farm Life (39)
    • Mother Nature (1)
    • Our Animals (24)
    • Our Garden (2)
    • Pigs (5)
    • Projects (1)
    • Recipes (16)

Recent

  • 2025-2026 Our Years of Transition
  • Our Farmstay Is Now Open!
  • The Best Way to Take Charge of Your Health
  • Love is…
  • My Summer Reading List

Archives

Copyright © 2026 · Focus Pro Theme on Genesis Framework · WordPress · Log in

Loading Comments...