Stuart Farm

  • Our Story
  • Shop
    • Our Store
    • Where to Buy
  • Come Enjoy a Farm Stay!
  • Our Classes
  • Fertrell Products
  • Contact Us
  • Blog Posts
    • Our Animals
    • Mother Nature
    • Our Garden
    • Recipes
    • Farm Life
    • Projects
  • Consultation Services
  • 0 items

Perfectly Cooked Meat Every Time

Posted on March 9, 2017 Written by Serena 2 Comments

When you start with quality meat, the last thing you want to do is overcook it.  Who want to spend top dollar on meat only to end up eating leather?!  I’ve tried all kind of techniques to make the perfect steak or chop.  I tried Alton Brown’s method of stove top to oven, and Gordon Ramsey’s method of turning every minute and liked both.  But knowing when the meat is done and not losing moisture by poking or cutting is key.  That is where the touch test comes in. (photo from www.thepapermama.com)

You could use a meat thermometer, but sometimes I just don’t feel like hassling with it (save the thermometer for poultry) and this touch test works great.   I never cook our meat past medium, and prefer medium rare. “But the blood!?”, you say. That actually isn’t blood, it’s a protein, so don’t let that keep you from enjoying a perfectly cooked piece of meat.  First, let the meat sit at room temp for at least 20 minutes.  This will help the meat cook evenly since it’s not ice cold in the center.  Skip this step and the touch test does not work as well.  Add whatever marinade or seasonings you want now.  

While you wait for the meat to get to room temp, practice doing the touch test to know the feel of your perfect doneness.  At first, you may not be able to tell much of a difference, but if you go through them quickly, there will be a clear difference.  Over medium-high heat, add 1 tablespoon of olive oil in a cast iron pan.  Once the pan is nice and hot, add the meat and turn it with tongs once every minute until it feels just about where you want it.  Smashing it down with a spatula or poking it with a fork will release the juices and you don’t want that.  I lightly press the meat, then my hand with the tongs. I usually don’t cook it more than 5-6 minutes total, so after the second turn, I will add 2 pats of butter to add flavor and keep it from sticking.  It will keep cooking once out of the pan, so make sure you don’t wait too long to remove it.  Once on the plate, allow it to rest for at least 5 minutes.  If you cut into it too soon, the juices will run and it will dry out. It may take a few times to get the feel of your perfect doneness, but remember, you can always put it back in and cook longer. Better to take it out too soon than too late.  Now go enjoy a perfectly cooked steak!

Did you try the touch test?

Leave a comment and let us know how it worked for you.

Filed Under: Recipes Tagged With: recipes

Tres Leche Cake

Posted on May 7, 2013 Written by Serena 1 Comment

I was very lucky to have my sister and 2 godsons come visit recently. And lucky for her, it was her birthday. Her only request was this cake. She had made it for Kees’ birthday and he declared it the best cake ever. When she told him it was my recipe and I made it even better, he was skeptical.  So this was the test to see who made the best tres leche cake.  After the first bite, mine was proclaimed the BEST cake.

I don’t quite remember when I first had this cake, but I fell in love with it. Well, I fell in love with the first one I had and then started to use this recipe which was just as good. Almost every one I have had since has not been as good as this recipe. When I lived in Hawaii, this was the cake my and my sister’s co-workers wanted for parties. The problem is people think you can just pour a bunch of milk on any ol’ cake and it will work. It doesn’t. They also think you can just top it with anything and it will be fine. It won’t. Then they think they can “fancy” it up with lime or pineapple flavoring. You can’t.
And when someone says, “a soggy cake?!” in disgust, tell them they are right and they should not eat ANY of it. Then have a second helping for yourself.

Tres Leche Cake
makes one cake, approx. 8 servings.

for the cake
1 Cup Sugar, divided
5 egg yolks–room temp.
5 egg whites–room temp.
1/3 Cup whole milk
1 teaspoon pure Vanilla extract
1 Cup flour
1 1/2 teaspoons baking powder

for the soaking mixture
1 can sweetened condensed milk (14 oz)
1 can evaporated milk (12 oz)
1/4 Cup heavy whipping cream (buy a pint of this as you will use the rest on the icing)
1 teaspoon pure vanilla extract (see the note in “Tips” below)

for icing
1/4 Cup powdered sugar, adding 2 tbsp more at a time to your taste.
1 3/4 Cup heavy whipping cream

strawberries, cut in slices to garnish the top
——————————-

Preheat oven to 350 F. Butter and flour bottom of a 9-inch springform pan or cut a sheet of parchment paper to fit.

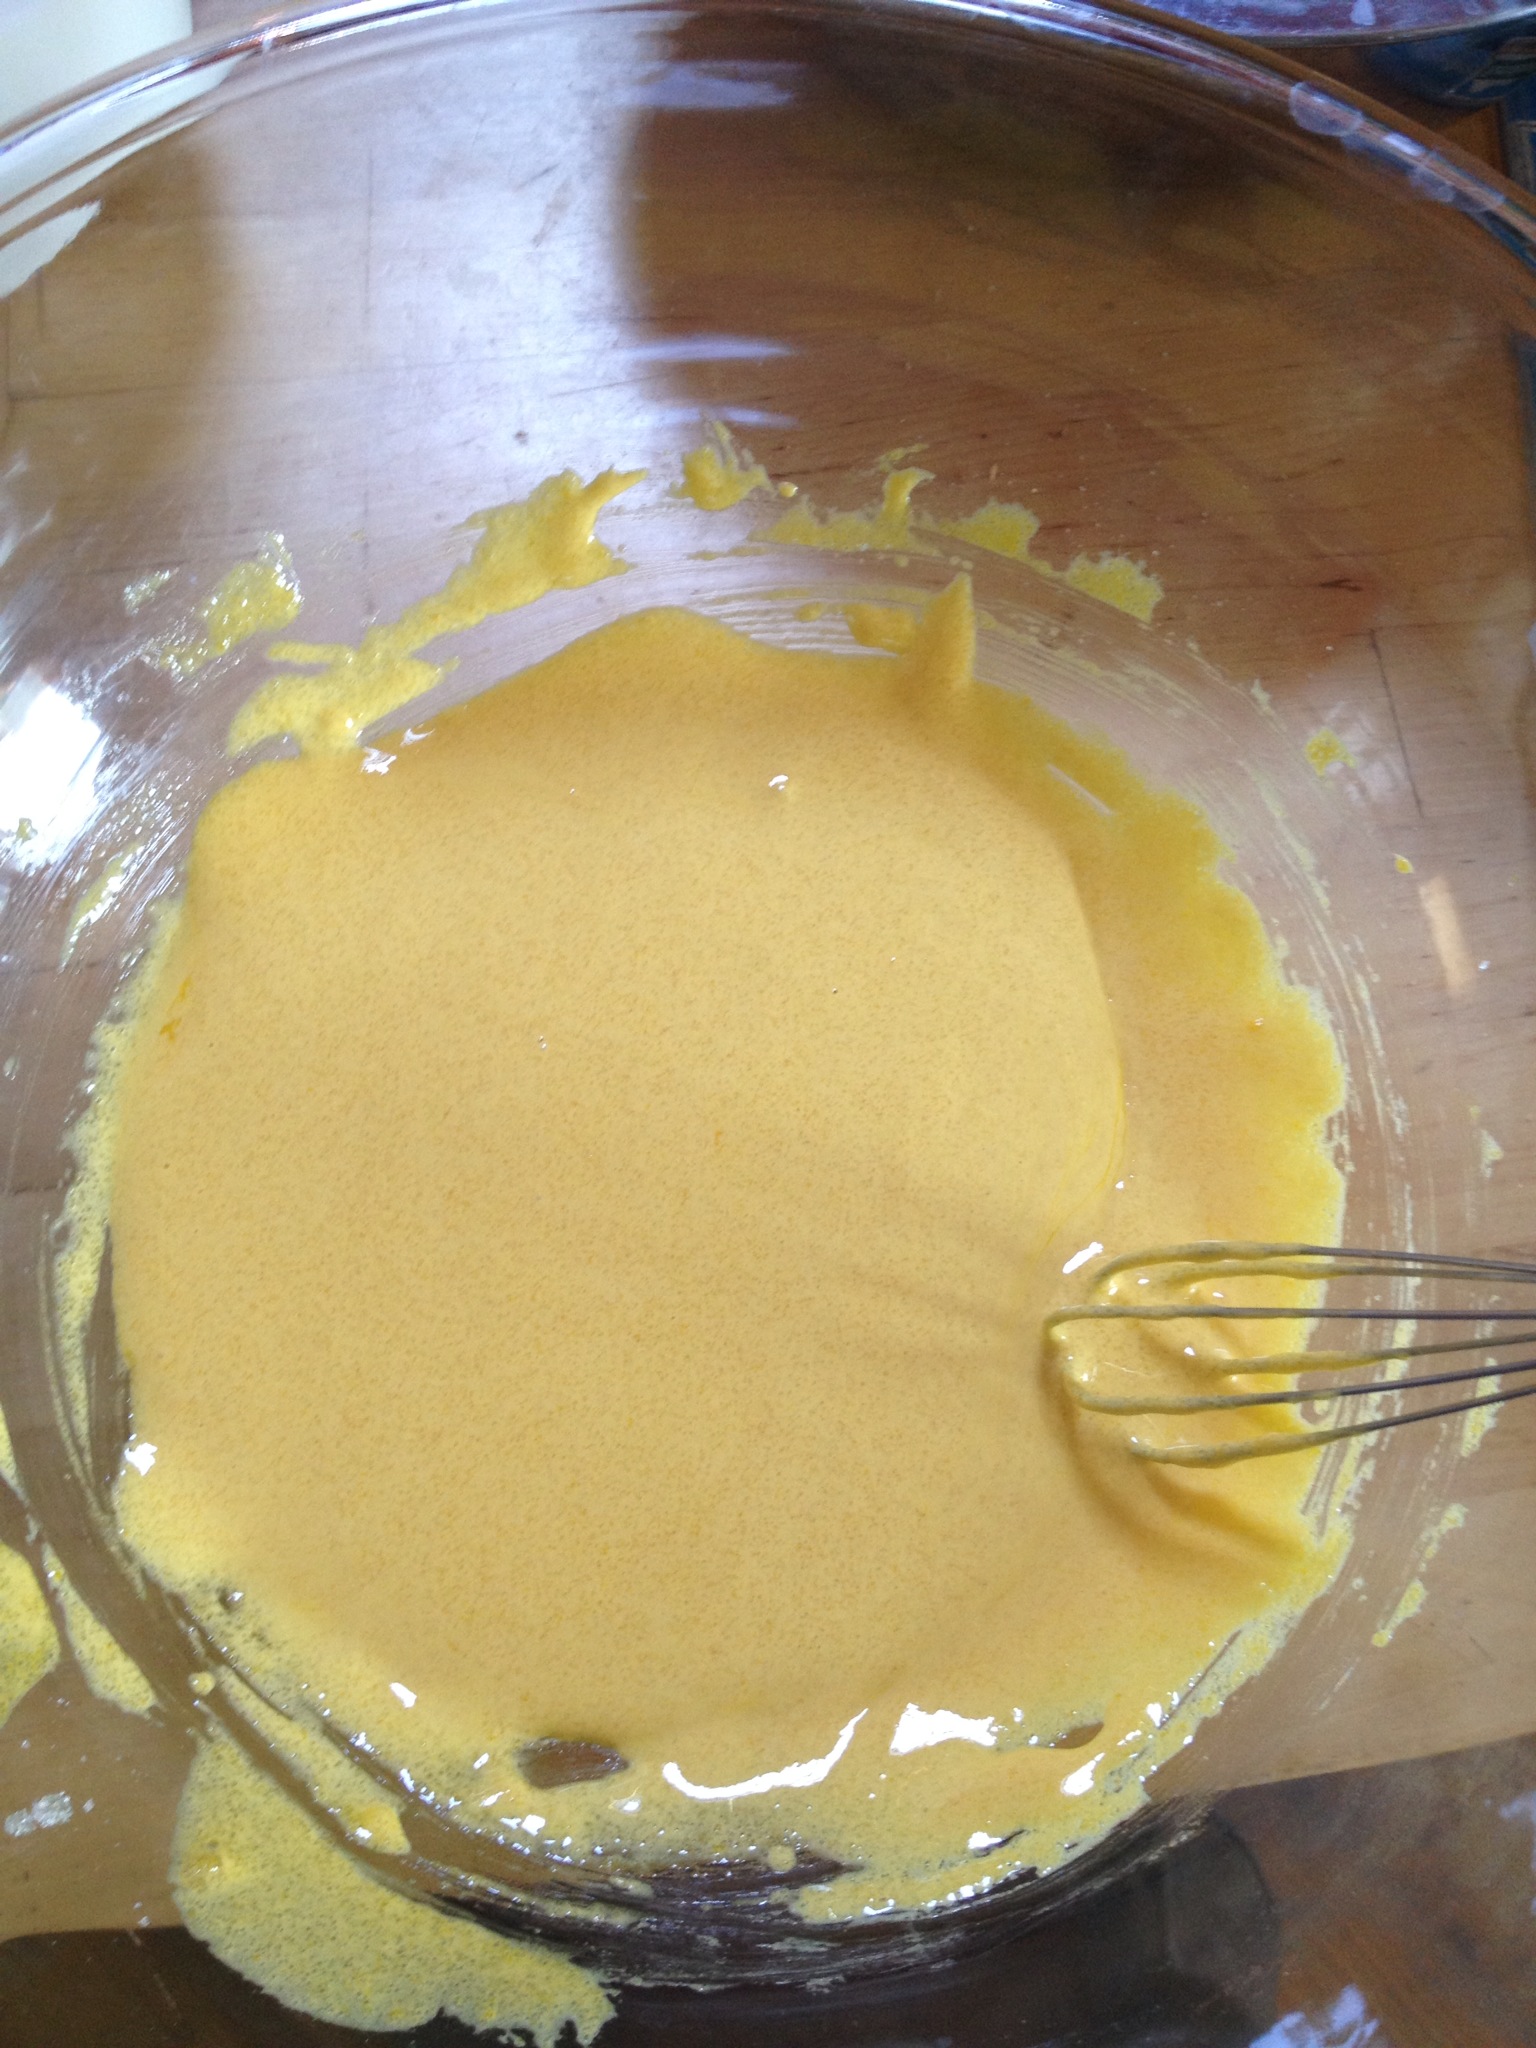
yolks and sugar mix


Beat 5 egg yolks with 3/4 cup of sugar until light in color and double in volume.

Stir in 1/3 cup whole milk, 1 teaspoon vanilla,  1 cup flour, 1 1/2 teaspoon baking powder.


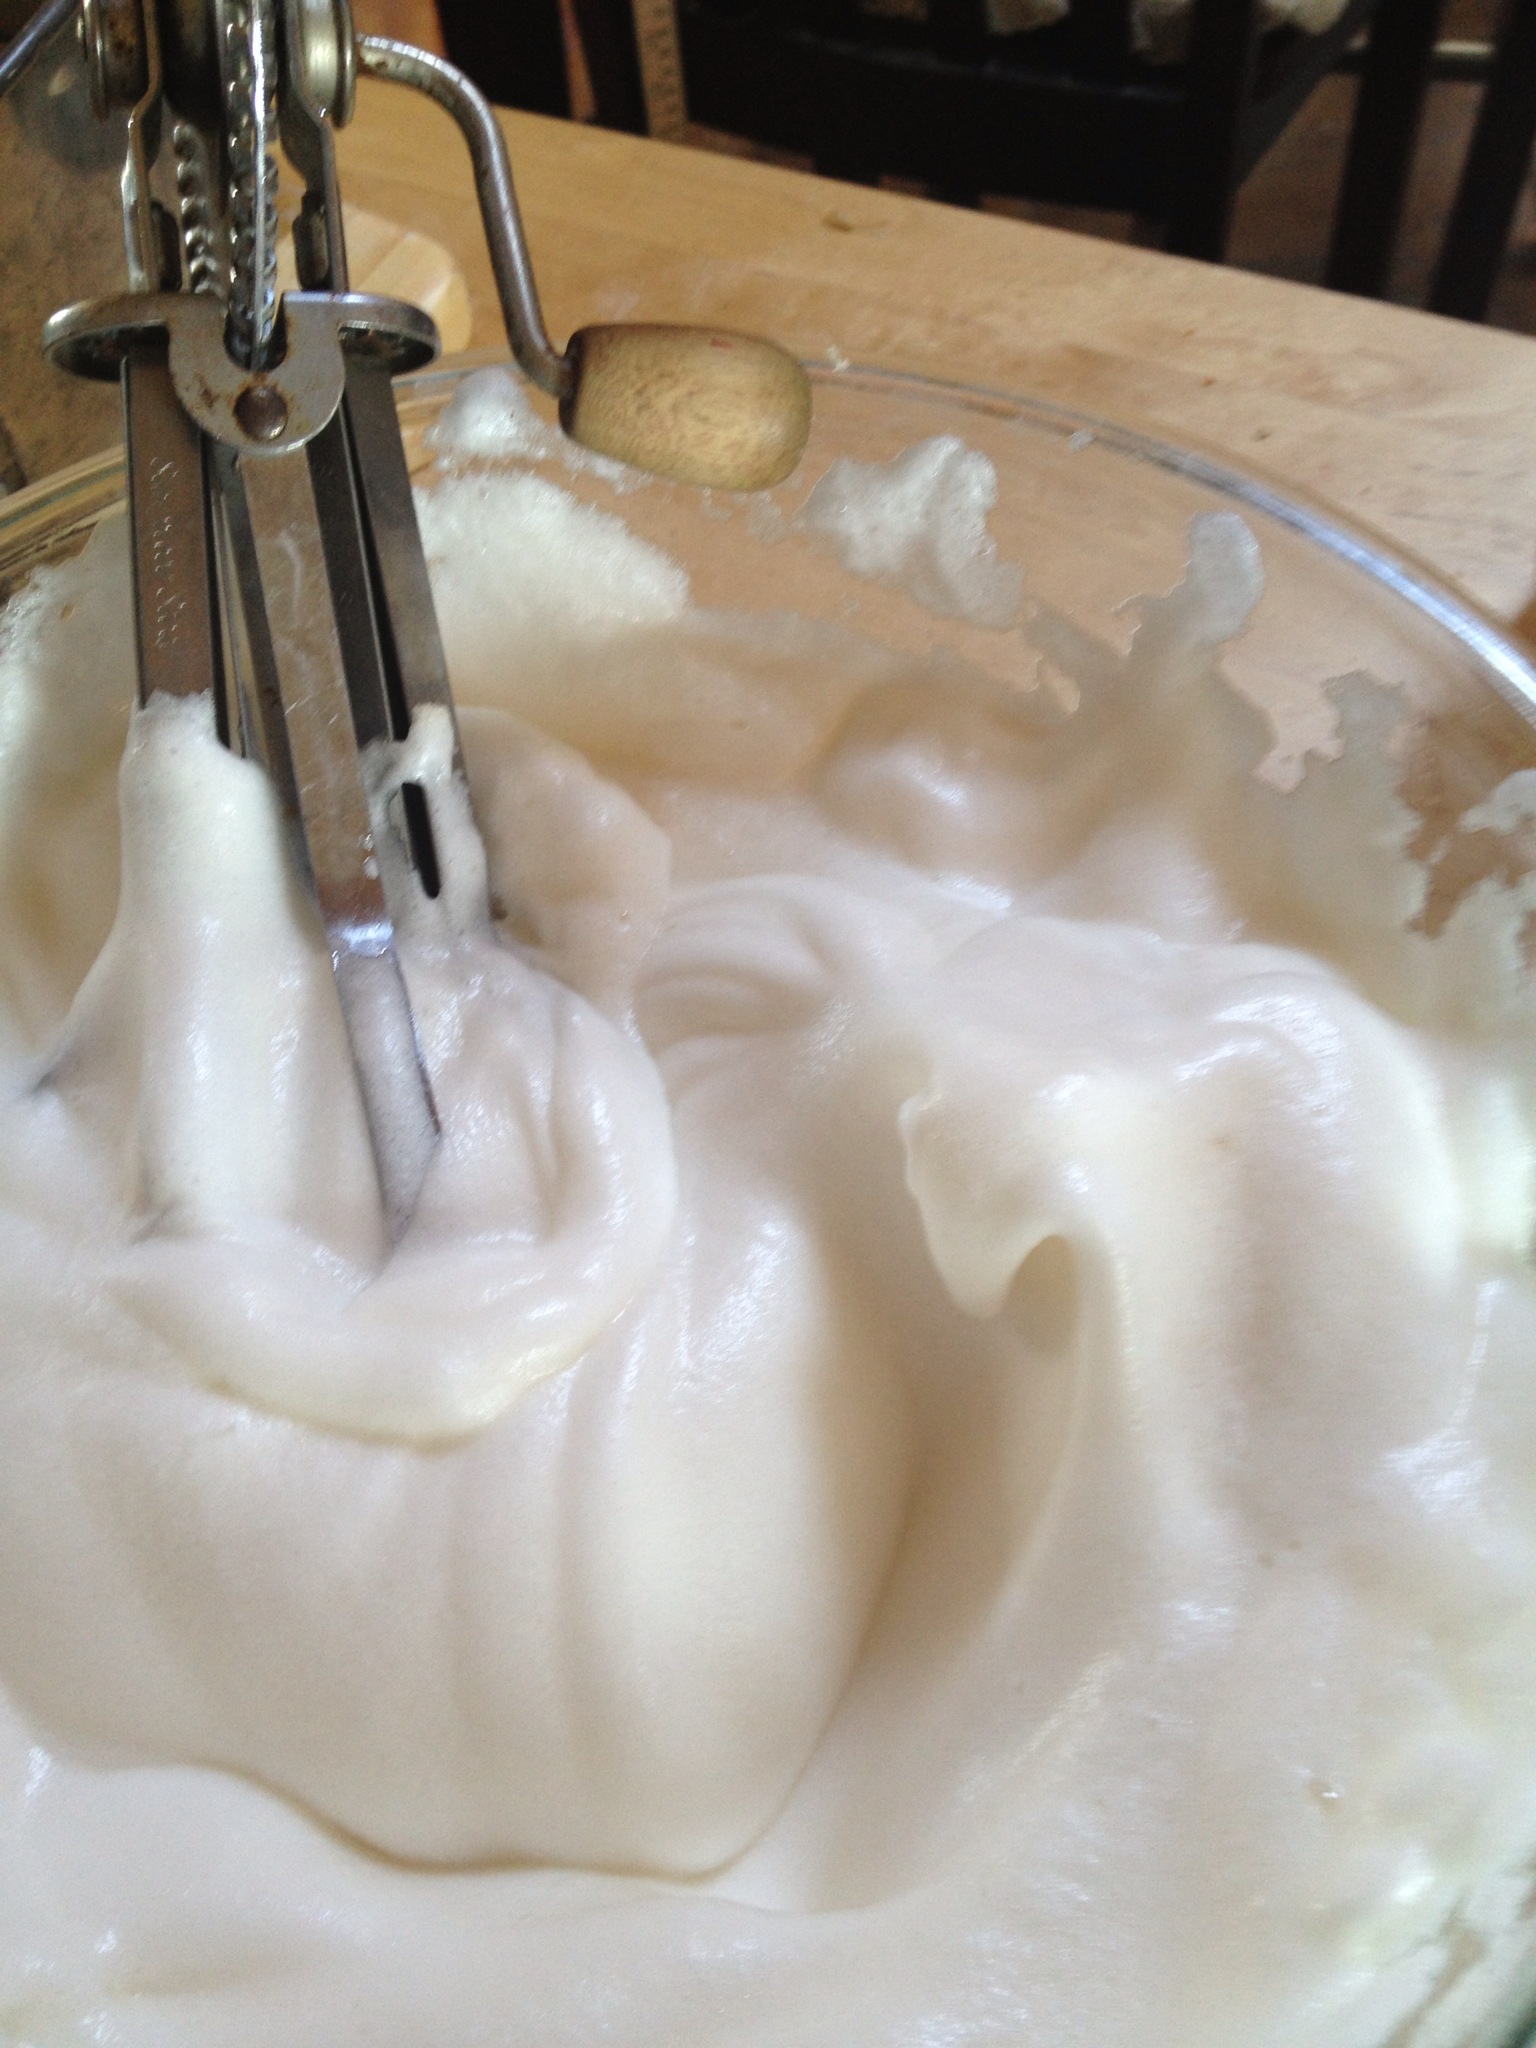
Soft Peaks


In a small bowl beat 5 egg whites until they form soft peaks.


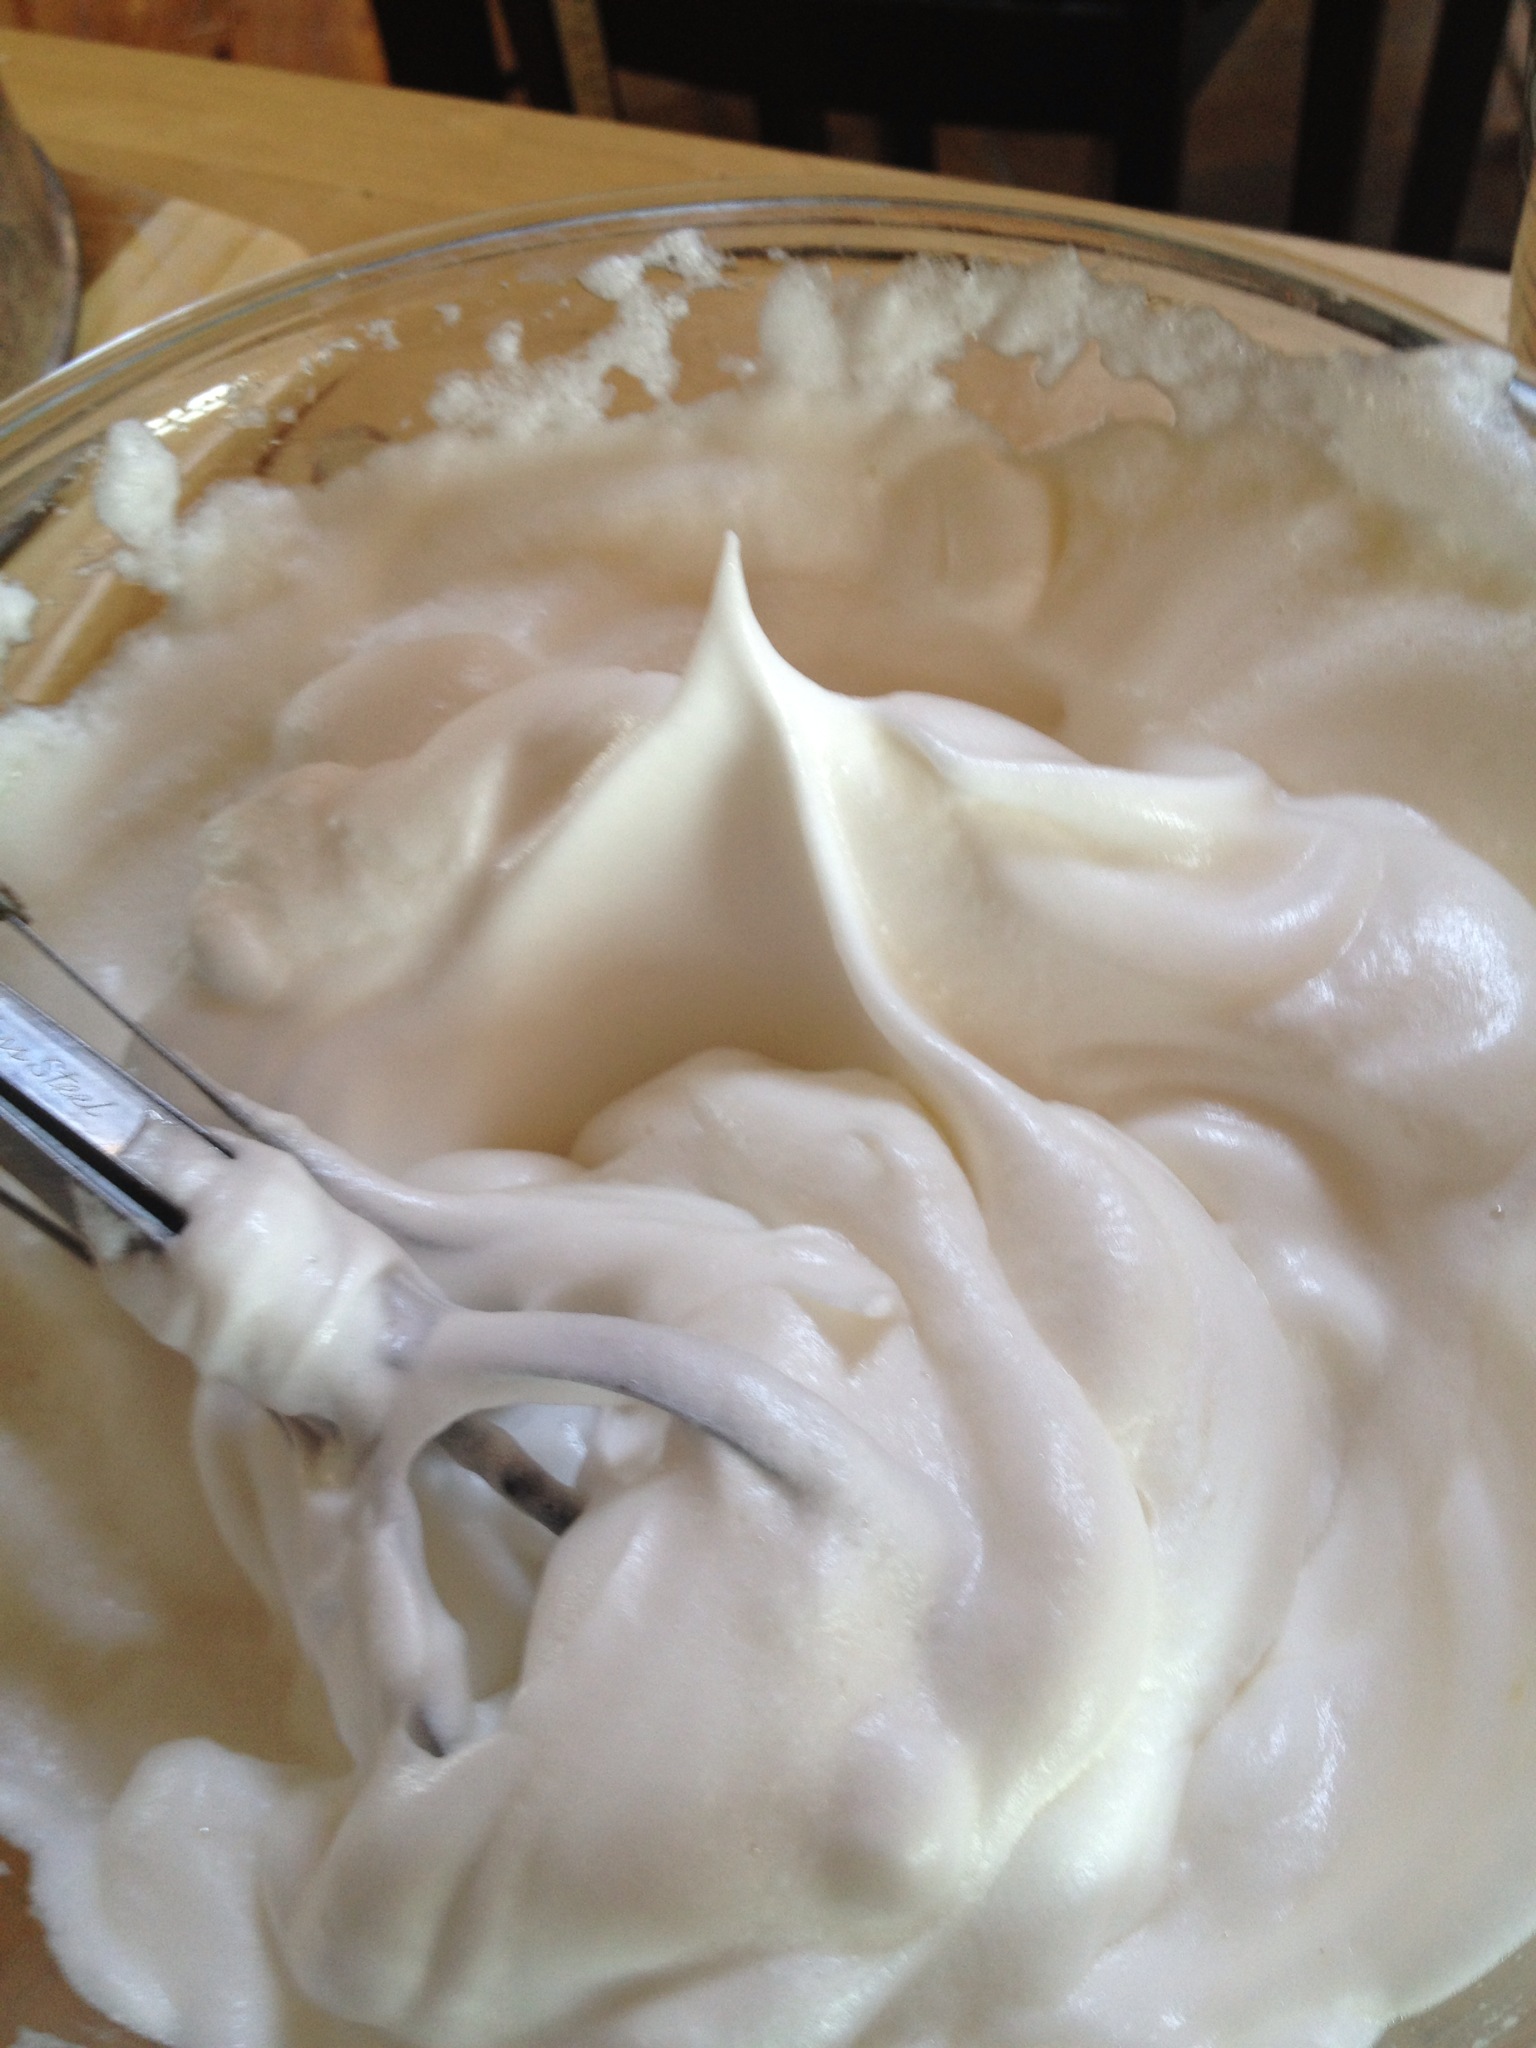
Stiff Peaks
Stiff Peaks


Gradually add in remaining 1/4 cup sugar. Beat until stiff peaks form with shine, but not dry.


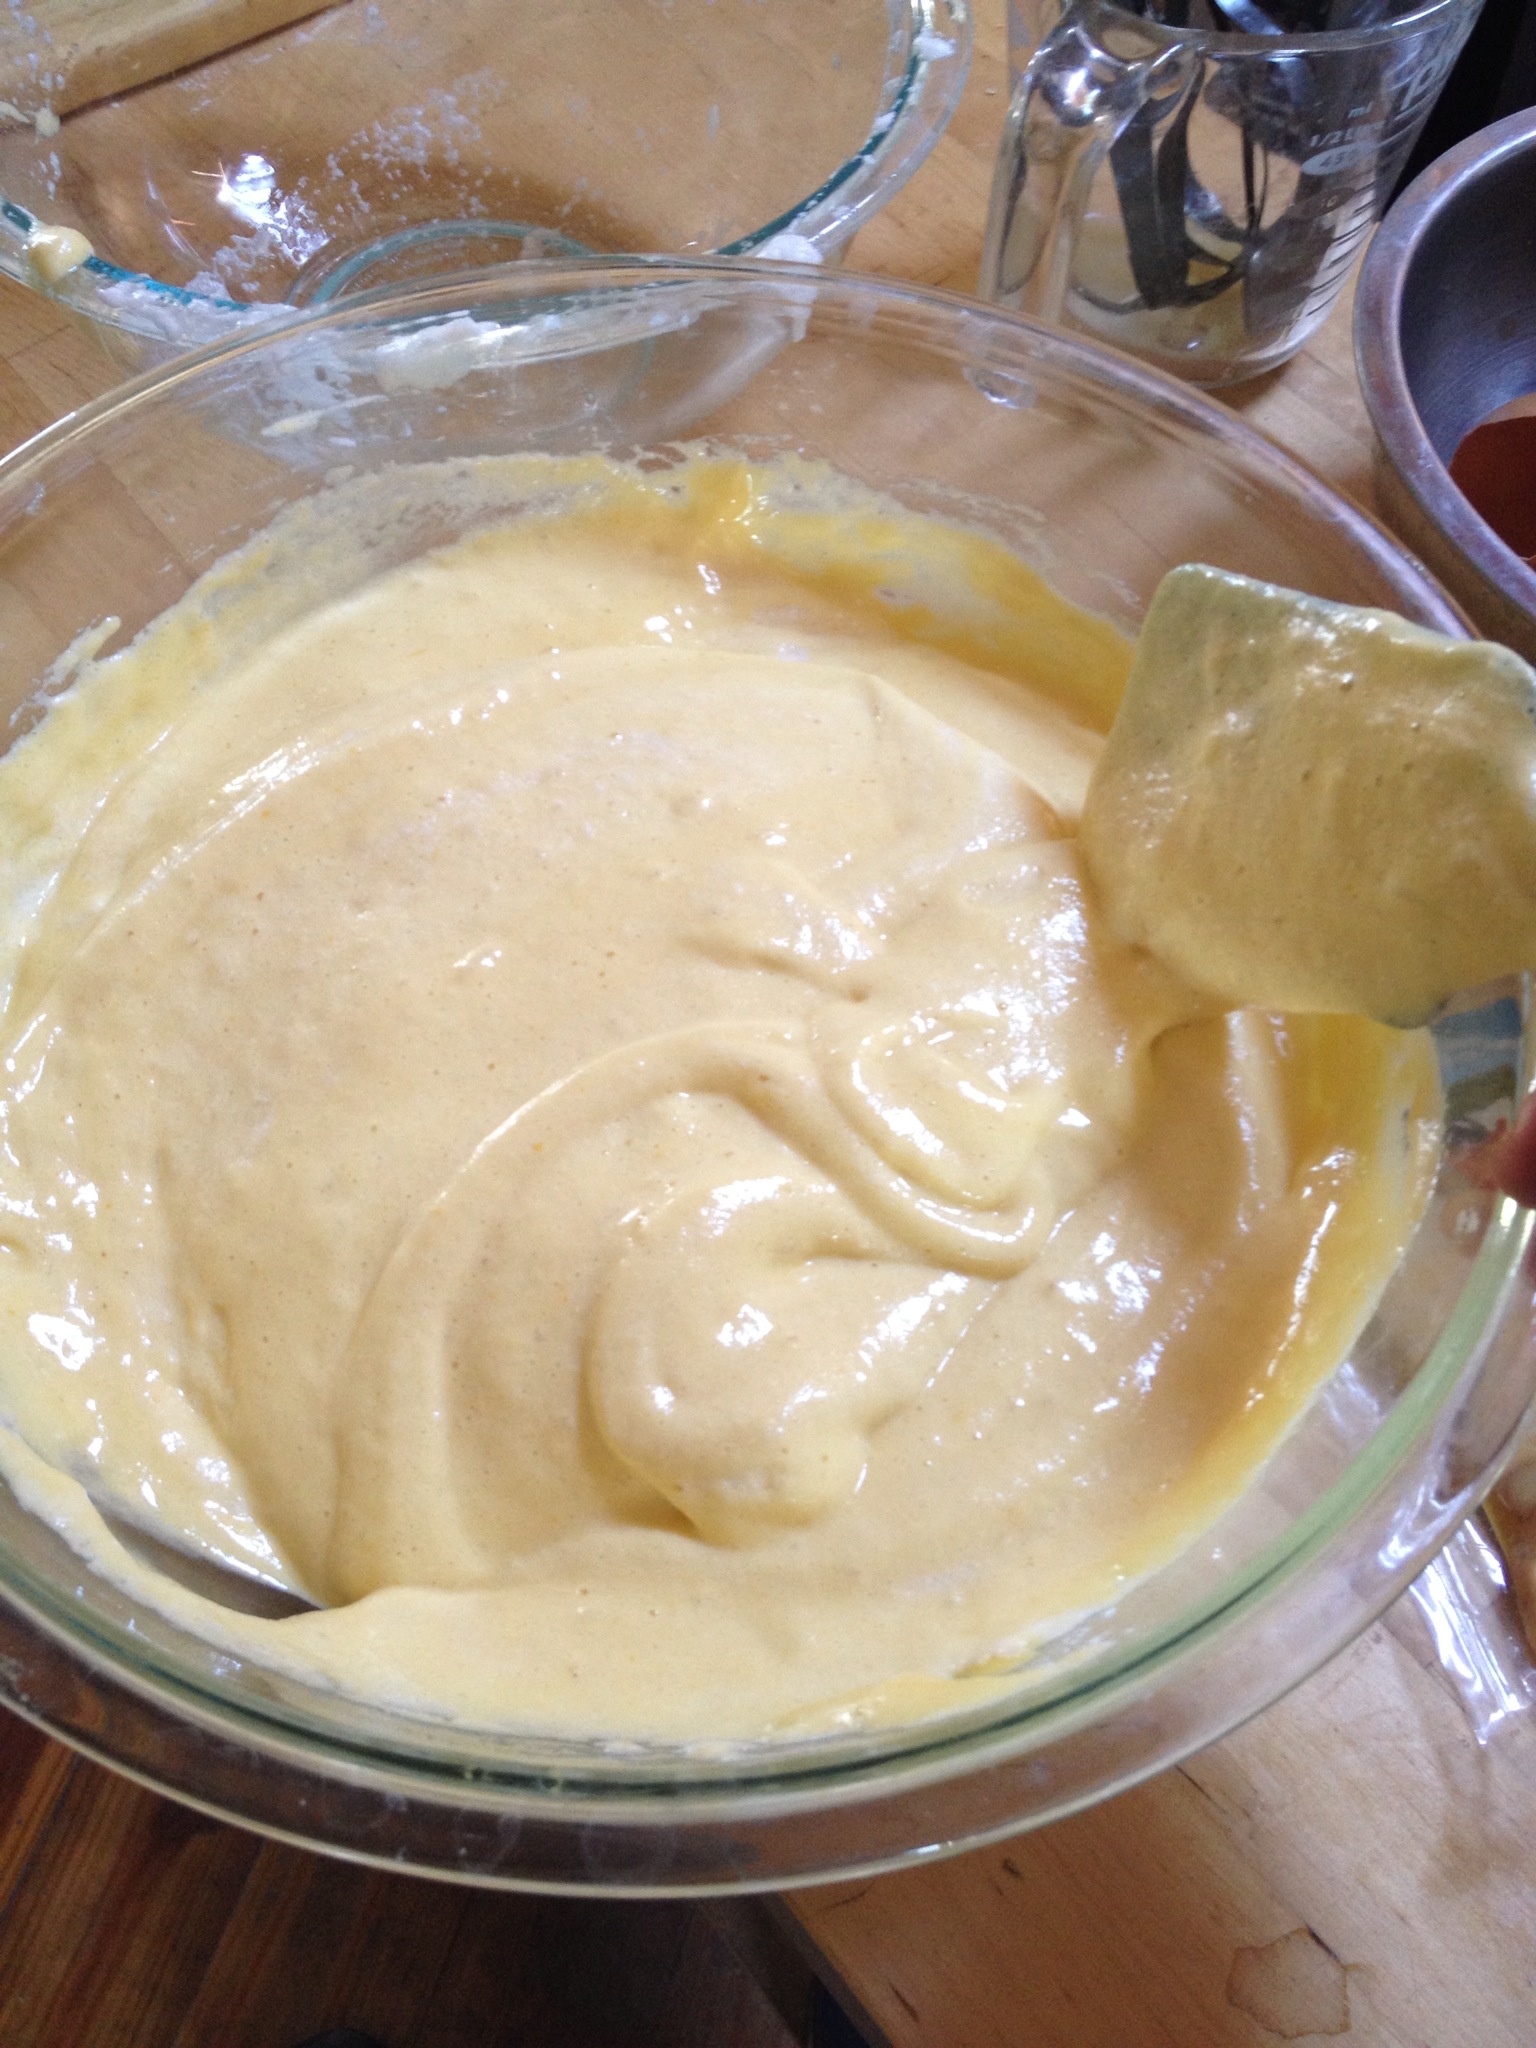
Yolk and white mixtures folded together


Fold 1/3 of the egg whites into egg yolk mixture until incorporated, then add the rest 1/3 at a time.


Pour into prepared pan. Bake for 45-50 minutes, or until cake tester inserted in the middle comes out clean.

Cool 10 Minutes. Loosen edge of cake with a knife before removing sides of the pan. Cool cake completely.

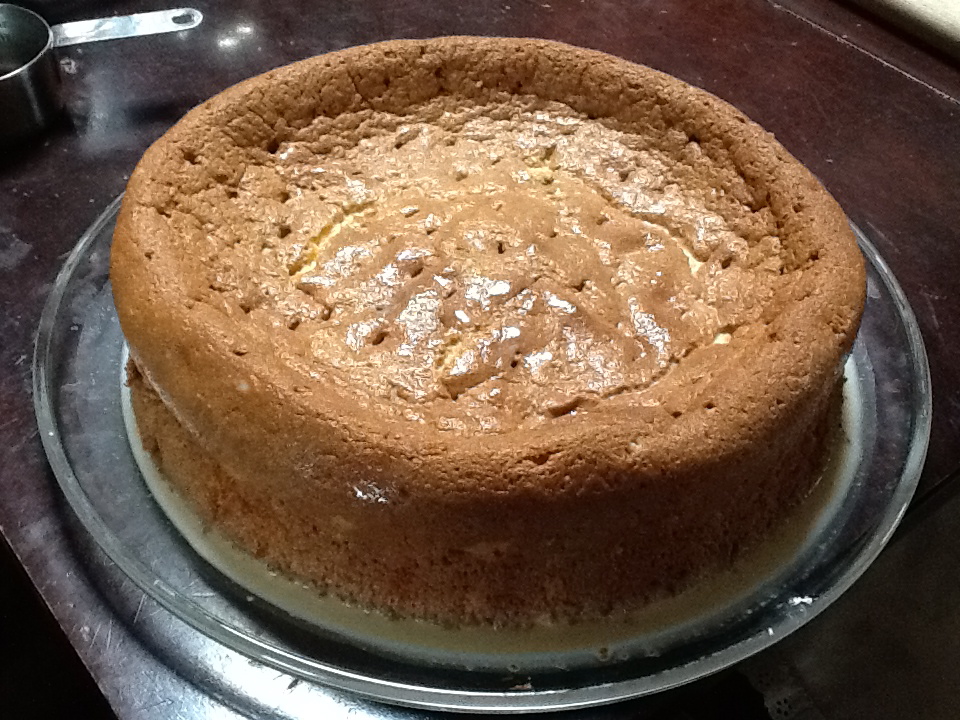
Just out of the oven

Place cake on a deep serving plate. Using a two-prong meat fork, chop-stick, or anything that will make a similar size hole, pierce entire surface of the cake.

Mix 1 can sweetened condensed milk, 1 can evaporated milk, 1/4 cup of heavy whipping cream, and 1 teaspoon vanilla extract.

Measure 1 cup of the milk mixture, pour over the cake, and refrigerate for 1-2 hours. Pour remaining milk mixture over cake, and refrigerate another 2 hours, or overnight.

Holes poked and soaking up the milk mixture

Mix heavy whipping cream adding in the powdered sugar to your desired sweetness. Whip mixture until it forms stiff peaks and is spreadable. Frost cake with mixture and garnish with strawberries.

Keep cake and leftovers refrigerated.

Tips:

Use glass or ceramic mixing bowls that are dry. When beating egg whites, this helps them form better and stay light.

I always use a springform pan, so I am not sure how a regular cake pan would work.

You can substitute low-fat for the whole fat milk products, but they don’t really take that much fat out. I have never tried this, so I am not sure how it would change the results.

You can use rum in the milk mixture instead of vanilla extract. The alcohol in the rum is not cooked out of the final product. Only use rum if it will be eaten by adults who drink.

You want to be gentle with this batter. The egg whites prepared separately give it the lightness it needs to soak up the milks and not be too dense. If you are unsure of your folding techniques, watch this video:

Filed Under: Recipes Tagged With: recipes sweets

Real Pecan Pie

Posted on March 31, 2013 Written by Serena 1 Comment

I have never been a huge fan of pecan pies. Always too sweet for me. And even before I became more concerned with my health, something about basically eating straight corn syrup just seemed wrong. So when everyone else called dibs on all the standard pies for Christmas one year, I decided to try this one. Now, I am a pecan pie addict!

I used the maple syrup we made and substituted sorghum we bought locally for the molasses. And you MUST toast the pecans. It brings out the flavor so much more than just plain. Just be carefully and watch them. I set a timer for 5 minutes and keep resetting until they are done. It is VERY easy to go from toasted to burned. I speak from experience.

Cook’s Illustrated has a great pie crust recipe I have in another post. However, if you don’t want to make your own, they recommend the Pillsbury refrigerated crust over the frozen.

Old-Fashioned Pecan Pie
Recipe from Cook’s Country
(Serves 8-10)

1 Cup Maple Syrup
1 Cup packed light brown sugar
½ Cup heavy cream
1 Tablespoon Molasses (or sorghum)

4 Tablespoons unsalted butter (cut into ½ in. pieces) (I use salted and reduce the salt to 1/4 tsp)
½ teaspoon salt

6 large egg yolks, lightly beaten

1 ½ Cups pecans, toasted and chopped
1 – 9-inch unbaked pie shell,
chilled in pie plate for 30 minutes

Adjust oven rack to lowest position and heat oven to 450 degrees.

Heat syrup, sugar, cream and molasses in saucepan over medium heat, stirring occasionally, until sugar dissolves, about three minutes.

Remove from heat and let cool 5 minutes.

Whisk butter and salt into syrup mixture until combined.

Whisk in egg yolks until incorporated.

Scatter pecans in pie shell. Carefully pour filling over.

Place pie in hot oven and immediately reduce oven temperature to 325 degrees.

Bake until filling is set and center jiggles slightly when pie is gently shaken, 45 to 60 minutes. Cool pie on rack for 1 hour, then refrigerate until set, about three hours and up to one day. Bring to room temperature before serving.

Filed Under: Recipes Tagged With: recipes sweets

How to Brine Chicken or Pork

Posted on March 14, 2013 Written by Serena 2 Comments

Most people over cook meat…chicken is no different. I’ll admit to cooking just a “few extra minutes” to make sure it’s cooked through.  So how do you get juicy tender meat but still make sure it’s cooked? Brine. Now this is not marinade. This is a way to get the meat to hold the moisture as long as possible, so those few extra minutes don’t ruin your dinner.  If you are interested in why and how it works, check out Cook’s Illustrated’ simple overview.    http://www.cooksillustrated.com/howto/print/detail.asp?docid=1630

There are A LOT of brine recipes. This is the one we like. Adjust as your taste requires.

You can make a gallon of this, and use only what you need.

1/2 cup sugar (brown sugar if you like a more caramel taste)

1 cup salt

1 gallon water

whatever seasonings you like–garlic (5 crushed cloves or 1 tbsp powder), black pepper ( 1 tbsp ground or peppercorns), oregano, rosemary, basil, etc.

Warm water to just below a boil, add salt, sugar, and seasonings and stir until dissolved. Allow to cool. Place meat in a container you can cover. Either a lid, plastic wrap, or plate. Add enough brine to cover meat. Place in refrigerator for at least 2 hours and up to 24 hours. When you are ready to cook, remove from container, pat dry and prepare as you like. If you don’t want it as salty, you can give it a quick rinse.


Filed Under: Recipes Tagged With: recipes

  • « Previous Page
  • 1
  • 2
  • 3
  • 4

Welcome to Stuart Farm!

We’re Serena and Fred Stuart. While raising healthy and happy animals is our #1 goal, we’re also here to serve you! If you’re looking for help in navigating healthy eating and living, you are in the right place! We’re here to answer your questions and help you feed your family meat and eggs you can feel good about. We share farm stories that gives you a peek into our life, recipes to try, health tips, and more. We hope you enjoy coming along on our farm adventures.

Connect with us

  • View StuartFarmLLC’s profile on Facebook
  • View stuart_farm’s profile on Instagram

Contact Us

573-764-2324 please leave a message .
Farm hours are by appointment only.

Tags

Beef recipes broth chickens delivery Devons Dorkings Eggs Farm Life Freedom Rangers garden lard pigs Pyrs raw diet recipes recipes sweets Silver Fox Rabbits Sugaring

Categories

  • Blog Posts (73)
    • Farm Life (39)
    • Mother Nature (1)
    • Our Animals (24)
    • Our Garden (2)
    • Pigs (5)
    • Projects (1)
    • Recipes (16)

Recent

  • 2025-2026 Our Years of Transition
  • Our Farmstay Is Now Open!
  • The Best Way to Take Charge of Your Health
  • Love is…
  • My Summer Reading List

Archives

Copyright © 2026 · Focus Pro Theme on Genesis Framework · WordPress · Log in

Loading Comments...